OPS245 Prep
Course Overview
Learning Outcomes
Delivery Mode
The most effective way to learn in this course is a combination of attending labs in person and doing your homework outside of class to solidify what you've learned.
Unfortunately this option is not automatically available these days, so we might have to make due with online learning. Each professor does this differently, they will tell you how labs and lectures will work in their sections.
Prerequisite skills
You're supposed to have learned some basic skills in the first semester. These skills will be reinforced but I'll assume that you already know how to do these things, or at least you can figure them out since you've done them before:
- Navigate a Linux filesystem tree.
- Use basic command like ls, cat, mkdir, cp, mv, etc.
- Read/understand and change file/directory permissions.
- Edit a text file on the commandline.
- Basic use of grep
- Copying files between Linux systems using scp
- Work with symbolic links.
That's a condensed list, it's obviously not complete.
Virtualized Operating Systems
In OPS245 you'll set up your own Linux workstation and your own Linux servers. Linux is a serious operating system, and for the best learning experience it would be best if you had the workstation running on bare metal. But since we don't have a lot of time together in person, and everyone's computer is different: the notes on this wiki will assume that you have all your Linux installations in virtual machines.
A guest operating system (the one you install in a virtual machine) is installed the same way as it would be on real hardware. In fact the OS you're installing is mostly unaware that it isn't being installed on real hardware. To make this possible: the host operating system runs a piece of software called a hypervisor. There are many popular ones (you may have used Vmware in other courses) - we are going to use VirtualBox in this course.
The guest operating system send countless requests to its (virtual) hardware, e.g.: to the CPU, the RAM, the video card, network card, sound cards, etc. The hypervisor's job is to provide simulated hardware to the guests, while passing the guest's requests to the real hardware.
Hardware Requirements
The concept of virtualized operating systems has been around for many decades, but only in the last couple of decades the technology has become accessible to the masses. These days just about every PC you can buy will come with a processor supporting virtualization (AMD and Intel CPUs have different technologies but they work equally well).
But there are many other things that are not "just about every PC". A tablet is not a PC, neither is an Apple laptop or desktop. The official hardware requirement for the course is that you have:
- A PC with virtualization capabilities (either AMD or Intel)
- With 16GB of RAM
- With at least 120GB of free space on an SSD (an external drive is not required, but may be useful depending on how you work)
Enable Virtualisation
For some reason the majority of computers are sold with their virtualisation capabilities turned off by default. If you haven't done this already (perhaps for another course):
- Reboot your machine,
- Press the appropriate key to get to the BIOS settings (technically it's not BIOS any more but let's not argue about that now),
- Find the setting to enable CPU virtualisation and make sure it's enabled.
Unfortunately steps 2 and 3 are done differently on different machines.
The key you need to press might be Delete, F10, F12, Escape, or something different. Usually there's a message as your machine boots that says something like "Press X to enter setup".
The setting you need to change isn't just different between AMD and Intel CPUs: it has different names for different motherboard manufacturers and models. So you'll have to figure out what it is for you. I've done this a hundred times and I still struggle finding it on one of my desktops because its extra confusing name and location.
Workstation Setup
Your job for this week is to set up your workstation. We'll use Linux Mint as a workstation in this course. Download the latest Cinnamon release from httpsc://www.linuxmint.com/
Linux installations have become so easy - it barely takes any effort. Do poke around the installer to find things you're not familiar with. Remember that the reason you're going to school is to learn stuff. Linux Mint has a pleasant and fast user interface, but I can't force you to install it on bare hardware on your laptop, so the instructions are built on the assumption that you're installing it as a VirtualBox VM.
Create and boot the virtual machine
- Start VirtualBox and click "New".
- Set workstation as the name.
- Choose a folder where you'll store the VM's virtual hard drive. If you're using your laptop: you can store it anywhere. If you're using a removable drive: store it in any folder you like on the removable drive.
- Pick Ubuntu (64 bit) as the Linux version. Linux Mint is based on Ubuntu, so it's almost the same thing.

- Give it at least 8GB (8192MB) of memory. Keep in mind that in later labs you will have more VMs to run at the same time. The host and each VM need its own RAM allocated. The total is limited by the size of your physical memory.
- Give it 2 CPUs, it seems to be required on some hardware.
- Create a virtual hard drive 30GB in size. The default VDI type is fine. A dynamically allocated disk is fantastic and I haven't found it to be any slower than a preallocated ('fixed size') virtual drive.

- You can pick the Linux Mint .iso file to boot from before you start the VM, or right after the first time you start it.

After you click Start: the virtual machine will boot from the virtual DVD disk (the ISO file). When you click inside the window the mouse and keyboard will be captured by the guest operating system. To release it from the VirtualBox window if you need to do something in your host operating system: press the right control key.
Note that the boot menu item says Start Linux Mint, not Install Linux Mint. Once your VM boots from the ISO file: you can use it, but it is not yet installed. At this point it's running purely from RAM, and any files you create or change will be stored in RAM, which is a volatile type of memory. All your changes will be lost as soon as you power off the virtual machine. This is a common Linux installer feature called running live.
Install Linux Mint
- Start the installer. The icon to do that is on the desktop.
- For keyboard layout you almost certainly want English (US) - that's the type of keyboards they sell in Canada. You can add other language input after the installation is complete if you want to.
- Do install the extra multimedia codecs. It's giving you the default option not to install them because the legal status of some of them is not 100% clear. You and I (being nobodys) can install these without any worries about getting sued.
- On the "Installation type" screen (this screen is really about partitioning and installation destination) leave the "Erase disk..." radio button picked and click the "Advanced features" button. Choose "Use LVM" in the list that pops up.

Note that the warnings about deleting everything are about your virtual hard drive, not your physical disk.
- Create a user with the same username as your school username. That will make some things easier later. Note that "Your name" is not the same as your username. You can set your name to anything you like, but the username needs to be correct.
- Name your computer workstation. This will be configured as your hostname. Note that the hostname doesn't need to be the same as the virtual machine name, but in our case it will be.
- The password can be weak if you're doing the work on your own computer. Your workstation virtual machine won't be accessbile by other people so the password strength won't be an issue in this case. Your host operating system's security settings will protect the virtual machine as well.

- Wait for the installation to complete.
- When it's done and you reboot - it will ask you to remove the installation media. That's your ISO file which is used as a virtual DVD, and it has already been ejected for you.
That's all it took: your instllation is complete.
Customize your workstation
Guest Additions
Install guest additions to get the screen to resize as the VM window resizes. This is a little tricky but it's worth doing.
- First insert the guest additions ISO file into the VM (it will prompt you do download it automatically if needed):


- Run the installer on the ISO, put in your user's password when it asks you.
- Reboot after the installation is complete.
If the above didn't work at lease change your resolution to something more reasonable:
- In the main menu you can find the "Display" settings. Pick the largest resolution that will fit on your screen. For example on my 1920x1080 laptop screen: the workstation VM window fits just fine when it's configured to use 1152x864 pixels.
Other Minor Things
If you're going to use this VM a lot (and you should): make it comfortable for yourself to use. This section has suggestions which might help, you don't need to do any of this if you don't want to. And you might think of your own customisations - which you're welcome to do.
- I don't like having icons showing in my taskbar if those applications aren't running, so I unpin them. Don't need the "Show desktop" button either.
- Right-clicking on the taskbar, "Applets" I change the following for the Grouped window list:
- Don't group windows by application.
- Button label: Window title
- In "System Settings":
- Screensaver:
- Don't start it automatically.
- Don't lock the computer when it goes to sleep or the screensaver starts.
- Startup applications, uncheck:
- Blueman
- Mint welcome screen
- Nvidia Prime support
- Update Manager
- Change the desktop background.
- Under Windows:
- Uncheck "Attach dialog windows to the parent window".
- Under Themes/Settings:
- Do not jump to position when clicking in a trough
- Do not use overlay scroll bars.
- Under Sound/Sounds:
- Uncheck at least the starting/leaving sounds.
- Screensaver:
- Click the System reports button in the bottom right system tray, and ignore the two reports there (language packs and system restore utility).
- Fix vi so the arrow keys don't do crazy things:
vi ~/.vimrc- Press i to go into insert mode
- Type in this text into the file:
:set nocompatible
- Press Escape to go back to command mode
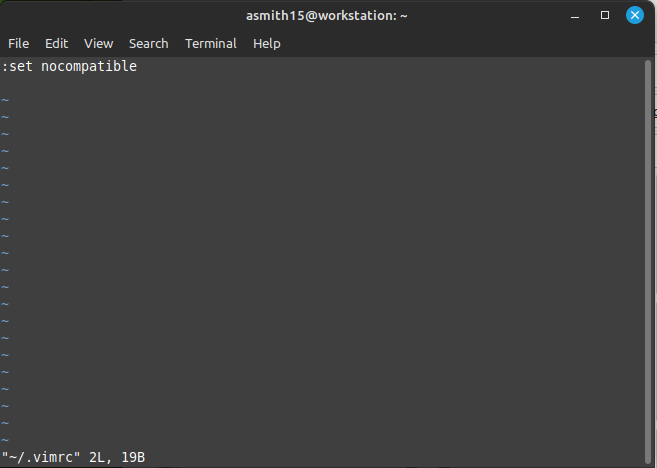
- Press : then q to save the file and exit vi.
- Do the same as the root user. More than half the time you will run vi will be as root.
- Allow yourself to run sudo without typing in a password:
- Edit the file /etc/sudoers as root:
sudo vi /etc/sudoers
- Change the %sudo line to contain:
%sudo ALL=NOPASSWD: ALL
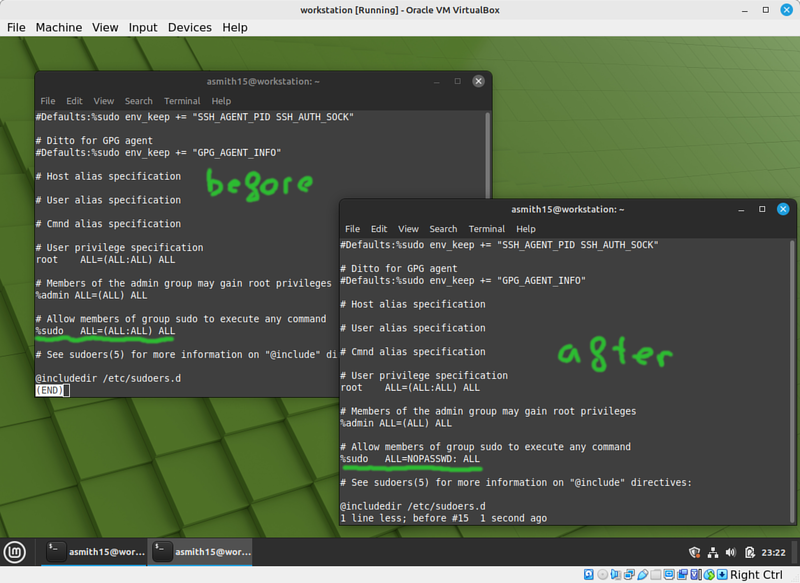
- Double-check that you made the change correctly. A mistake in this file can make your machine unusable, and you'll have to reinstall it.
- Because the sudoers file doesn't have write permissions: you'll need to save it in vi with :w! instead of :w
- After you save the sudoers file: open a new terminal, and run a command such as this to confirm that you can still run things as the administrator (that's what sudo is for):
sudo cat /etc/shadow
- Edit the file /etc/sudoers as root:
- Set your root password:
- Personally I don't like that my regular user is the only administrator of my system. I like to have direct access to the traditional Linux administrator: root.
- Run this to set root's password:
sudo passwd root
- Change your default terminal window size.
- Set the Firefox homepage to
http://wiki.littlesvr.ca/wiki/OPS245_Weekly_Schedule


Submit evidence of your work
This is not a graded lab, so you don't need to submit anything. Just remember that labs require the previous work to be done, so if you leave this prep work for later: you'll end up with double the work to do next week: which will likely be harder, not easier for you.