OPS345 Assignment 2: Difference between revisions
Jump to navigation
Jump to search
| (4 intermediate revisions by the same user not shown) | |||
| Line 1: | Line 1: | ||
This assignment assumes you've learned something in the labs, and you can use that knowledge to install a real-world, useful web application. Without someone holding your hand through the process. | |||
= Set up Roundcube = | = Set up Roundcube = | ||
* Install and configure Apache and PHP. | * Install and configure Apache and PHP on your email server. | ||
** Instead of creating a separate storage device for the web server data: store the data in /home/www and use a symbolic link from /var/www to point to it. | ** Instead of creating a separate storage device for the web server data: store the data in /home/www and use a symbolic link from /var/www to point to it. | ||
** Only allow access to your web server via HTTPS. Choose whatever means you like to accomplish this. | ** Only allow access to your web server via HTTPS. Choose whatever means you like to accomplish this. | ||
| Line 11: | Line 13: | ||
** Similar to what your did for Nextcloud: you'll need to create a database inside ops345db, and a new user and password. | ** Similar to what your did for Nextcloud: you'll need to create a database inside ops345db, and a new user and password. | ||
* Complete all the needed fields in https://email.youruserid.ops3455.ca/installer | * Complete all the needed fields in https://email.youruserid.ops3455.ca/installer | ||
* Alter your config.inc.php so that Roundcube doesn't attempt to use encryption to connect to your SMTP server on localhost: <syntaxhighlight lang='php'> | |||
$config['smtp_server'] = 'localhost:25'; | |||
$config['smtp_user'] = ''; | |||
$config['smtp_auth_type'] = '';</syntaxhighlight> | |||
* Delete the installer directory after you've tested that everything works and you made your screenshots. | * Delete the installer directory after you've tested that everything works and you made your screenshots. | ||
* Send an email from Roundcube to youruserid@youruserid.ops345.ca | * Send an email from Roundcube to youruserid@youruserid.ops345.ca | ||
| Line 24: | Line 30: | ||
Please submit on Blackboard one asg2.tar.gz file containing screenshots of your work (as individial images) with the correct filenames. Skip screenshots of work you didn't do: | Please submit on Blackboard one asg2.tar.gz file containing screenshots of your work (as individial images) with the correct filenames. Skip screenshots of work you didn't do: | ||
* '''asg2-ss01-https.png''': a screenshot of Firefox showing some webpage on your email server accessed via HTTPS. It can be your webmail if you got it to work. | * '''asg2-ss01-dirs.png''' a screenshot of you running <syntaxhighlight lang="bash">mount | grep home && ls -lad /var/www && ls -la /var/www/ /home/www/</syntaxhighlight> on your email server. | ||
* '''asg2- | * '''asg2-ss02-https.png''': a screenshot of Firefox showing some webpage on your email server accessed via HTTPS. It can be your webmail if you got it to work. | ||
* '''asg2- | * '''asg2-ss03-http.png''': a screenshot of Firefox or a terminal showing that you cannot access your email server via HTTP. | ||
* '''asg2- | * '''asg2-ss04-db''': a screenshot showing that you created your database/user/password. | ||
* '''asg2- | * '''asg2-ss05-config1.png''' one or more screenshots showing what you've done in the installer/ web interface. | ||
* '''asg2- | * '''asg2-ss05-config2.png''' make as many screenshots as you need to show all the above. | ||
* '''asg2- | * '''asg2-ss06-errorlog.png''' a screenshot of you running <syntaxhighlight lang="bash">date && tail /var/log/httpd/ssl_error_log</syntaxhighlight> on your email server. | ||
* '''asg2- | * '''asg2-ss07-received.png''': a screenshot of Roundcube showing you received the email you sent from Roundcube. | ||
* '''asg2-ss08-bonus.png''': a bonus mark if you sent the email from one user to another user on the email server. | |||
(to create asg2.tar.gz select all your screenshots in a file manager in Linux Mint, right click, and pick "Compress") | (to create asg2.tar.gz select all your screenshots in a file manager in Linux Mint, right click, and pick "Compress") | ||
[[Category:OPS345]] | [[Category:OPS345]] | ||
Revision as of 01:05, 30 November 2022
This assignment assumes you've learned something in the labs, and you can use that knowledge to install a real-world, useful web application. Without someone holding your hand through the process.
Set up Roundcube
- Install and configure Apache and PHP on your email server.
- Instead of creating a separate storage device for the web server data: store the data in /home/www and use a symbolic link from /var/www to point to it.
- Only allow access to your web server via HTTPS. Choose whatever means you like to accomplish this.
- Get the latest "Complete" package from the Roundcube website.
- Decompress the files (and move them if need be) so that the root of your https://email.youruserid.ops3455.ca goes straight to Roundcube.
- Follow the instructions in the INSTALL file in the package.
- Look at /var/log/httpd/ssl_error_log if you're having problems. The keywords php-xml and php-mbstring should be helpful for you.
- Create a database inside your existing ops345db "instance".
- Similar to what your did for Nextcloud: you'll need to create a database inside ops345db, and a new user and password.
- Complete all the needed fields in https://email.youruserid.ops3455.ca/installer
- Alter your config.inc.php so that Roundcube doesn't attempt to use encryption to connect to your SMTP server on localhost:
$config['smtp_server'] = 'localhost:25';
$config['smtp_user'] = '';
$config['smtp_auth_type'] = '';
- Delete the installer directory after you've tested that everything works and you made your screenshots.
- Send an email from Roundcube to youruserid@youruserid.ops345.ca
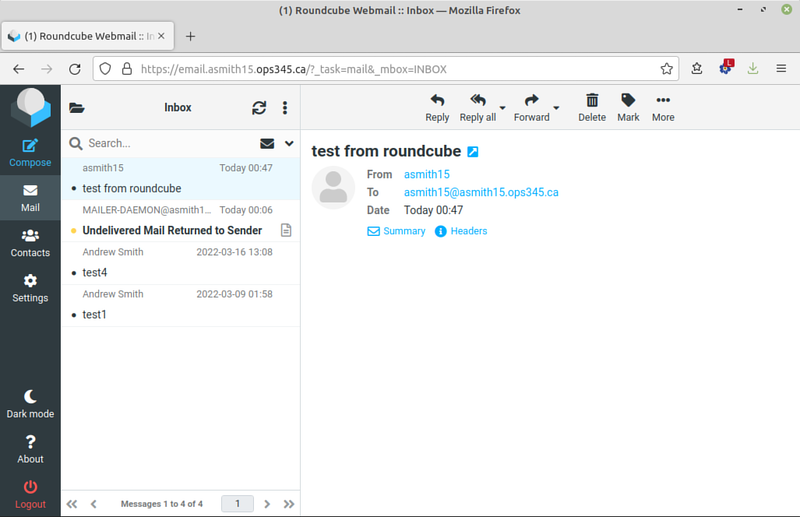
It should ultimately look something like this:

The instructions for this assignment are sparse because you've already done all the needed steps in previous labs. It will take you some time though to remember what your did in which lab and why.
Submission
Please submit on Blackboard one asg2.tar.gz file containing screenshots of your work (as individial images) with the correct filenames. Skip screenshots of work you didn't do:
- asg2-ss01-dirs.png a screenshot of you running on your email server.
mount | grep home && ls -lad /var/www && ls -la /var/www/ /home/www/
- asg2-ss02-https.png: a screenshot of Firefox showing some webpage on your email server accessed via HTTPS. It can be your webmail if you got it to work.
- asg2-ss03-http.png: a screenshot of Firefox or a terminal showing that you cannot access your email server via HTTP.
- asg2-ss04-db: a screenshot showing that you created your database/user/password.
- asg2-ss05-config1.png one or more screenshots showing what you've done in the installer/ web interface.
- asg2-ss05-config2.png make as many screenshots as you need to show all the above.
- asg2-ss06-errorlog.png a screenshot of you running on your email server.
date && tail /var/log/httpd/ssl_error_log - asg2-ss07-received.png: a screenshot of Roundcube showing you received the email you sent from Roundcube.
- asg2-ss08-bonus.png: a bonus mark if you sent the email from one user to another user on the email server.
(to create asg2.tar.gz select all your screenshots in a file manager in Linux Mint, right click, and pick "Compress")