OPS245 Lab 5
LVM Overview
A fixed partitioning setup works fine in many scenarios, but it lacks a lot of flexibility. Using LVM we can avoid the slow and complicated process you've seen in the previous lab, when we tried to extend the size of a partition.
Here's a comparison of how a physical storage device is used in the traditional setup (the one we've worked with in lab 4) and in LVM:
| Traditional partitioning | LVM |
|---|---|
|
|
Effectively a logical volume is equivalent to a partition, but it is not expected to be fixed in size, and it is not stuck on any specific hardware storage device.
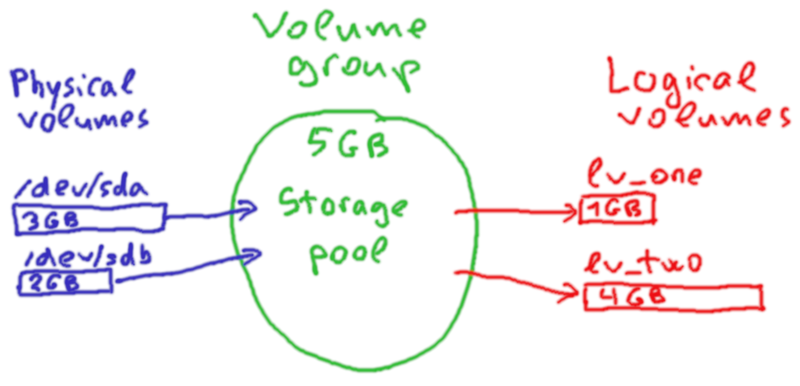
Here's a graphical overview of how storage is managed in an LVM system:
In this example there are two drives (one 3GB and the other 1GB in size). They are both added to the LVM storage pool (called a volume group). Then two logical volumes are created using the space available in the volume group (one 1GB and the other 4GB in size).
Note that this kind of setup would be impossible to do with traditional partitioning. Since a partition must fit on one drive: you couldn't have a 4GB partition in this case.
