OPS245 Lab 1
In this lab we'll set up three new virtual machines to act as servers, and we'll use Debian for the Linux distribution.
To give you a better overview of the common Linux installation options available: the three servers will be installed using different methods.
You'll need two ISO files:
- A large DVD image which includes all the packages you're likely to install. Download the latest one from here.
- A much smaller "netinst" image. This contains just the most common defaults, and the rest is downloaded from the internet during installation. Download the latest from here (for example debian-11.6.0-amd64-netinst.iso).
server1
The relatively large DVD ISO file you'll use for installing server1 (that's the number 1, not the letter L) includes all the software that most people typically want installed. The rest of the software can be downloaded from the internet later. Putting all the available Debian packages on DVD images would require over 19 DVD disks, which very few people want therefore they're not even available for download.
It's a large file to download but the potential benefit is: you only need to download it once, and you can use it an unlimited number of times, therefore potentially saving much time and bandwidth. Since we're not installing a lot of software: the DVD download is not saving us any time or bandwidth, but hopefully it's not hard for you to imagine that you might install much more than the minimum selection of packages.
Create a new virtual machine in VirtualBox
- Name it server1
- Store it in the same location as your workstation (each VM will have its own folder)
- For the ISO Image pick the Debian DVD you downloaded earlier.
- Confirm that Linux / Debian (64bit) is selected for the Type and Version.
- Check the Skip Unattended Installation box.
- Since we're not going to be installing a graphical user interface in this machine: it needs much less RAM, give it 1GB
- 2 CPUs, in case your hardware requires it.
- The graphical user interface also requires disk space, and since we're not installing one: allocate just 10GB for your new virtual disk
Install Debian from a DVD ISO
- Choose graphical install.
- Pick Canada (presumably) for your Locale. This is not the same choice as the keyboard layout when you installed Linux Mint.
- The keyboard layout choices are on the following screen - you almost certainly want American English since that works with the keybords they sell here.
- Set server1 as your hostname, to match the virtual machine name.
- Leave the domain name empty. We won't be doing much of anything in this course that will use the domain name.
Unlike the Linux Mint installer: the Debian one asks you for both the root password (the administrator) and a regular user with a password.
- Pick a root password.
- The next two screens ask you for a full name and a username for the regular user it will create. Remember that the full name doesn't really matter and the username should be the same as your Seneca username, just as you did with your workstation VM.
- Ideally pick a different password for your regular user than your root user. That way you will more quickly learn which tasks you need the root privileges for.
- Your timezone is probably Eastern.
- Pick the Guided - use entire disk option. server1 is going to have a traditional partition setup, not using LVM.
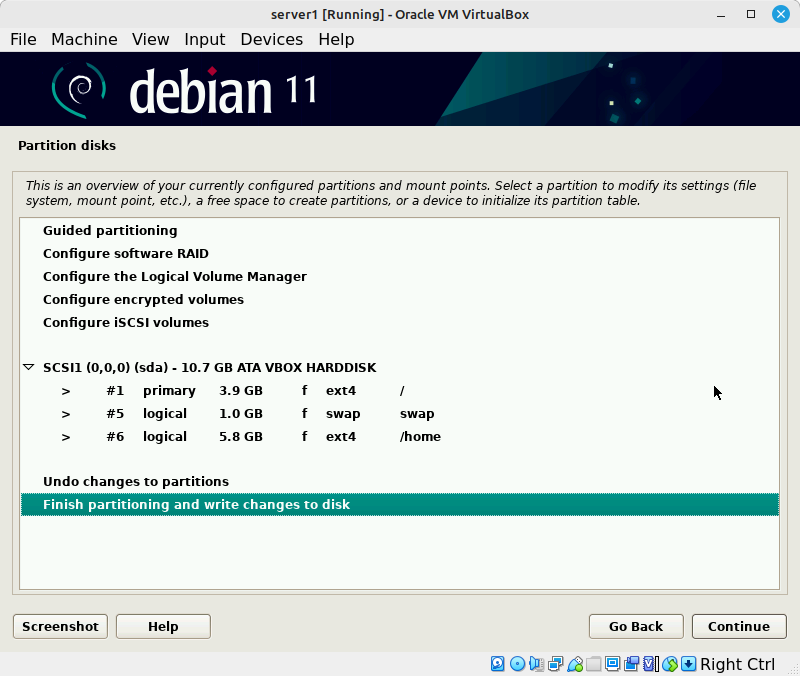
- Choose the Separate /home partition option. You should end up with something like this (the exact sizes don't matter, though your disk should be about 10GB.:
- Write those changes to disk. Remember that this is your VirtualBox disk - which is just a file on your host, not the physical disk in your computer.
Installing the packages shouldn't take long, since they don't need to be downloaded. They're just extracted from the installation ISO file and copied onto your new filesystem.
- Leave the No option checked for adding a network mirror. Anything you'll be installing in this course will be available from the first DVD.
- Since we aren't planning to have a graphical interface in server1: there's no need to pick any extra package groups on the Software selection screen.
- Install the GRUB boot loader - this is the tiny piece of software that loads your kernel after your computer (the virtual machine in this case) starts.
- Pick /dev/sda for the device to install GRUB on.
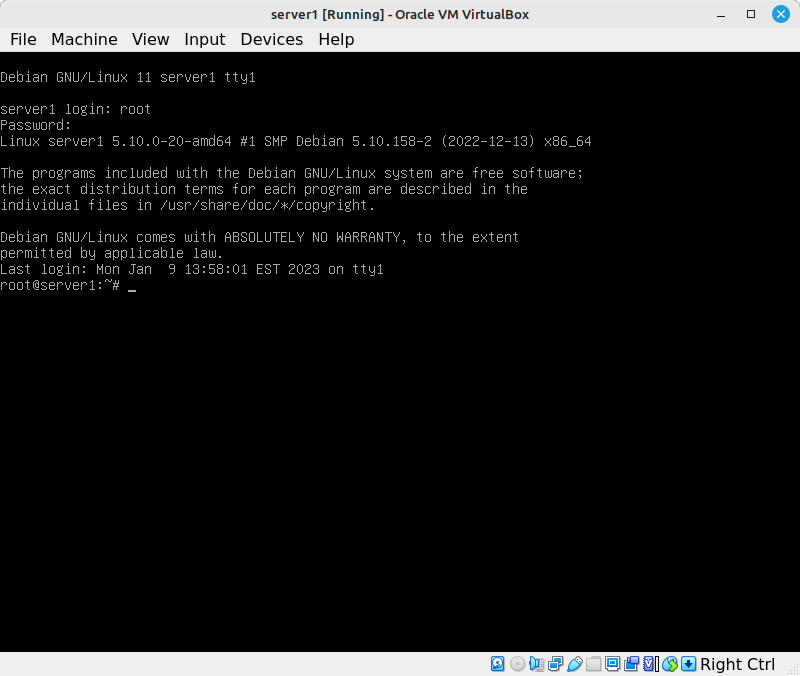
After the reboot - the installation is finished. Note that all you get is a commandline interface, no graphics. This is typical for a Linux server, since most of them don't even have a monitor/keybord/mouse attached.
server2
The installation using a minimal CD ISO is nearly identical to a DVD ISO. The only difference is that depending on the selection of software you choose to install: the installer will download some or most of it from the internet.
Create a new virtual machine in VirtualBox
- Name it server2
- Store it in the same location as your workstation/server1
- For the ISO Image pick the Debian netinst ISO you downloaded earlier. Try to make sure that you don't accidentally use the DVD ISO you used for server1.
- Confirm that Linux / Debian (64bit) is selected for the Type and Version.
- Check the Skip Unattended Installation box.
- 1GB of RAM
- 2 CPUs, in case your hardware requires it.
- 10GB for the new virtual disk
Install Debian from a minimal CD ISO
Because this is so similar: the instructions will assume you'll know what to choose most of the time. Remember to read what it says on the screen. Even if you don't understand it now: it's a good way to start learning.
- Pick Install instead of graphical install, just to see the difference.
- Hostname: server2
- Leave the domain name empty.
- Set the same root password as you did for server1
- Use the same regular username and password as you did for server1
- For partitioning: choose Guided - use entire disk and set up LVM
- For the partitioning scheme: choose Separate /home, /var, and /tmp partitions
- Leave the default maximum for the Amount of volume group to use
- Leave the default No for Scan extra installation media
This installer will ask you which mirror you want to use. A mirror is a web server that has exact copies of all the packages on the main server. They have mirrors to spread out the load, so that the main servers aren't overwhelmed.
- Leave the defaults for all the mirror questions, though you can pick a Canadian mirror (ending in .ca) if you're feeling charitable.
- You are not using an HTTP Proxy.
- Leave the defaults for the Software selection screen, server2 will also have a command-line only interface.
- Answer Yes, on /dev/sda for the GRUB questions.
After the reboot: you server2 is ready to use.
server3
If you're setting up a server with a custom configuration (disk layout, software selection, etc.) you would install it as you did server1 and server2.
But sometimes you just need many servers that are configured in exactly the same way. In that case you would set up the first one from scratch, and make as many clones of it as you need.
server3 will be cloned from server2. It takes less than a minute, and the only thing you'll need to update on it is the hostname. Just make sure server2 is installed and configured properly first.
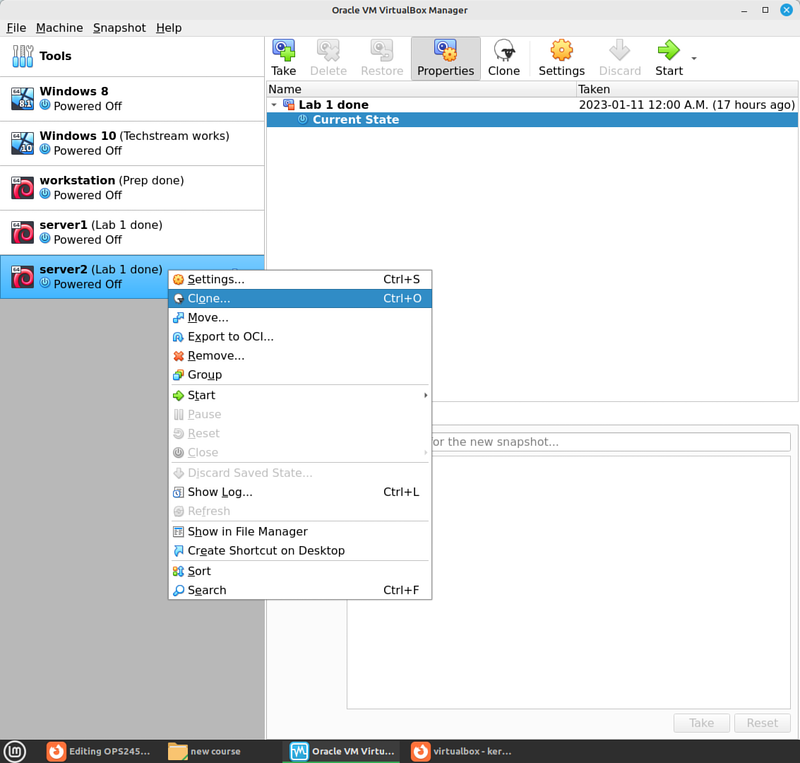
- In VirtualBox: right-click on server2 and pick Clone
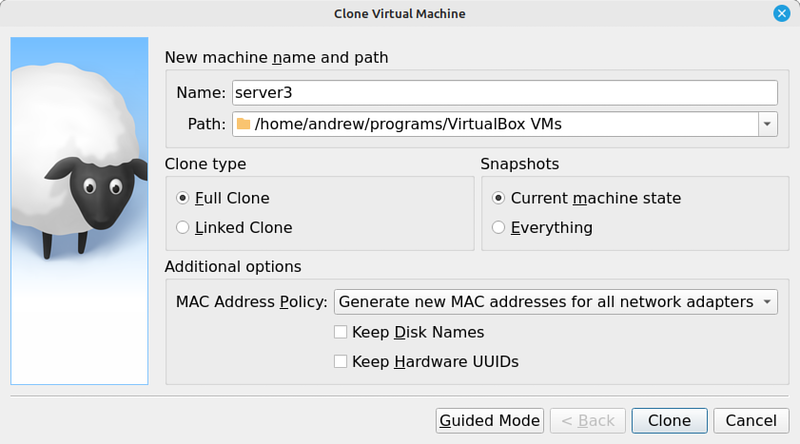
- Change the name to server3
- Pick Generate new MAC addresses
- Notice that it will take a few seconds to make a copy of the disk.
- Log in as root, and change the hostname with this command:
hostnamectl set-hostname server3
Submit evidence of your work
Submit one or more screenshots to show that you've completed the work:
- server1 running, log in as your seneca user, run su - to switch to root.
- server2 running, log in as your seneca user, run su - to switch to root.
- server3 running, log in as your seneca user, run su - to switch to root.


