OPS245 Lab 1: Difference between revisions
| Line 40: | Line 40: | ||
* Ideally pick a different '''password''' for your regular user than your root user. That way you will more quickly learn which tasks you need the root privileges for. | * Ideally pick a different '''password''' for your regular user than your root user. That way you will more quickly learn which tasks you need the root privileges for. | ||
* Your '''timezone''' is probably '''Eastern'''. | * Your '''timezone''' is probably '''Eastern'''. | ||
* | * Pick the '''Guided - use entire disk''' option. server1 is going to have a traditional partition setup, not using LVM. | ||
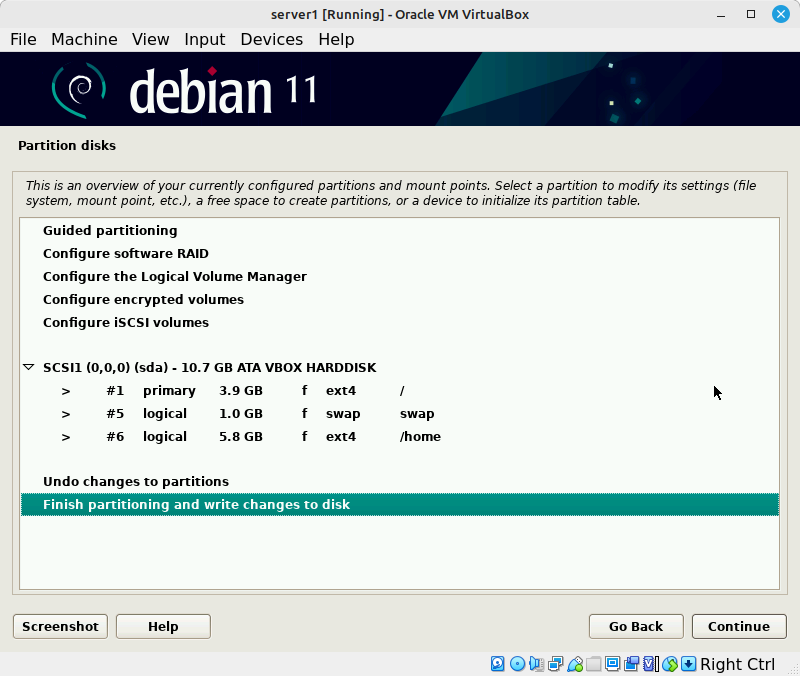
* Choose the '''Separate /home partition''' option. You should end up with something like this (the exact sizes don't matter, though your disk should be about 10GB.: | |||
[[File:Server1InitialPartitions.png|800px|border|center]] | |||
Revision as of 13:44, 9 January 2023
!!!THIS LAB IS NOT READY YET!!!
In this lab we'll set up three new virtual machines to act as servers, and we'll use Debian for the Linux distribution.
To give you a better overview of the common Linux installation options available: the three servers will be installed using different methods.
You'll need two ISO files:
- A large DVD image which includes all the packages you're likely to install. Download the latest one from here.
- A much smaller "netinst" image. This contains just the most common defaults, and the rest is downloaded from the internet during installation. Download the latest from here (for example debian-11.6.0-amd64-netinst.iso).
server1
The relatively large DVD ISO file you'll use for installing server1 (that's the number 1, not the letter L) includes all the software that most people typically want installed. The rest of the software can be downloaded from the internet later. Putting all the available Debian packages on DVD images would require over 19 DVD disks, which very few people want therefore they're not even available for download.
It's a large file to download but the potential benefit is: you only need to download it once, and you can use it an unlimited number of times, therefore potentially saving much time and bandwidth. Since we're not installing a lot of software: the DVD download is not saving us any time or bandwidth, but hopefully it's not hard for you to imagine that you might install much more than the minimum selection of packages.
Create a new virtual machine in VirtualBox
- Name it server1
- Store it in the same location as your workstation (each VM will have its own folder)
- Pick Linux / Debian (64bit) for the Type and Version.
- Since we're not going to be installing a graphical user interface in this machine: it needs much less RAM, give it the default 1GB
- The graphical user interface also requires disk space, and since we're not installing one: allocate just 10GB for your new virtual disk.
Install Debian
- Start your new virtual machine, and boot it from the Debian DVD you downloaded earlier.
- Choose graphical install.
- Pick Canada (presumably) for your Locale. This is not the same choice as the keyboard layout when you installed Linux Mint.
- The keyboard layout choices are on the following screen - you almost certainly want American English since that works with the keybords they sell here.
- Set server1 as your hostname, to match the virtual machine name.
- Leave the domain name empty. We won't be doing much of anything in this course that will use the domain name.
Unlike the Linux Mint installer: the Debian one asks you for both the root password (the administrator) and a regular user with a password.
- Pick a root password.
- The next two screens ask you for a full name and a username for the regular user it will create. Remember that the full name doesn't really matter and the username should be the same as your Seneca username, just as you did with your workstation VM.
- Ideally pick a different password for your regular user than your root user. That way you will more quickly learn which tasks you need the root privileges for.
- Your timezone is probably Eastern.
- Pick the Guided - use entire disk option. server1 is going to have a traditional partition setup, not using LVM.
- Choose the Separate /home partition option. You should end up with something like this (the exact sizes don't matter, though your disk should be about 10GB.:
